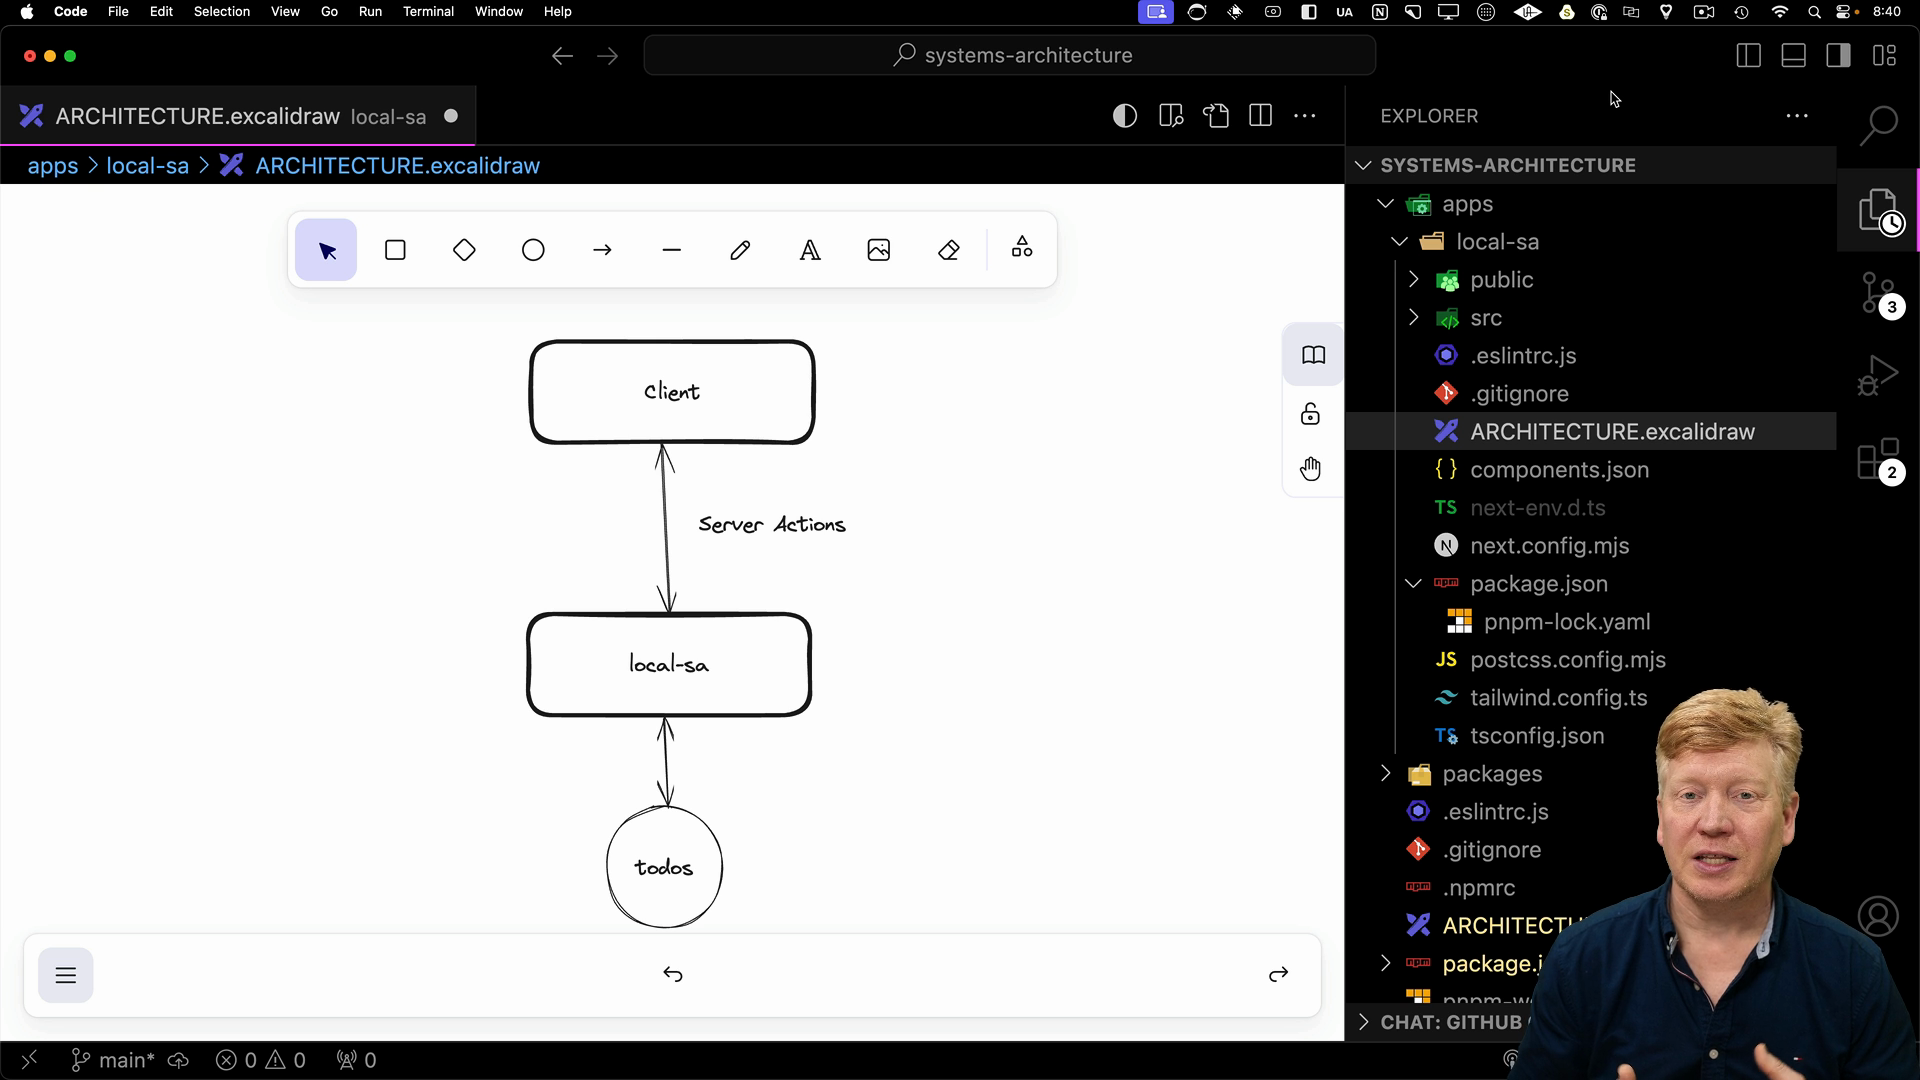
The server action variant of the local architecture is perfect for small teams, startups, or internal admin tools where simplicity and efficiency are key.
Project Setup
We're starting with a Next.js project set up in the apps/local-sa directory. You can launch it using:
pnpm dev:local-sa
Understanding the Architecture

The architecture is simple– here's the flow:
- Data Fetching (RSC): The app uses a React Server Component (RSC) on the homepage to fetch to-dos from the
todoslibrary. - Client-Side Rendering: The RSC passes the fetched data to the client-side component for rendering.
- Server Actions: The client utilizes server actions for any updates (adding, marking complete, deleting) to the to-dos.
- Revalidation: After a server action completes, we revalidate the
/route, triggering a refresh and reflecting the changes in the UI.
Code Walkthrough
Let's break down the code.
page.tsx
The important parts are in local-sa/src/app/page.tsx where the to-do list operations are imported at the top of the page. We get the user's session, priorities, and to-dos. The to-dos are fetched only when the user is logged in.
import { auth } from "@/auth";
import { revalidatePath } from "next/cache";

import {
  Todo,
  getTodos,
  PRIORITIES,
  addTodo,
  updateTodoCompletion,
  deleteTodo,
} from "@repo/todos";

import AuthButton from "@/components/AuthButton.server";

import TodoList from "./TodoList";

export default async function Home() {
  const session = await auth();

  const priorities: string[] = PRIORITIES;

  const todos: Todo[] = session?.user?.id ? getTodos(session?.user?.id) : [];

  async function addTodoAction(
    title: string,
    priority: string,
    completed: boolean = false
  ) {
    "use server";
    const session = await auth();
    if (!session?.user?.id) throw new Error("User not authenticated");
    addTodo(session?.user?.id, {
      id: `${session?.user?.id}-${Date.now()}`,
      title,
      priority,
      completed,
    });
    revalidatePath("/");
  }

  async function updateTodoCompletionAction(
    todoId: string,
    completed: boolean
  ) {
    "use server";
    const session = await auth();
    if (!session?.user?.id) throw new Error("User not authenticated");
    updateTodoCompletion(session?.user?.id, todoId, completed);
    revalidatePath("/");
  }

  async function deleteTodoAction(todoId: string) {
    "use server";
    const session = await auth();
    if (!session?.user?.id) throw new Error("User not authenticated");
    deleteTodo(session?.user?.id, todoId);
    revalidatePath("/");
  }

  return (
    <main>
      <AuthButton />
      {session?.user && (
        <TodoList
          todos={todos}
          priorities={priorities}
          addTodoAction={addTodoAction}
          updateTodoCompletionAction={updateTodoCompletionAction}
          deleteTodoAction={deleteTodoAction}
        />
      )}
    </main>
  );
}
Server actions addTodoAction, deleteTodoAction, updateTodoCompletionAction are defined to manage to-do modifications.
TodoList.tsx
The TodoList.tsx Client Component is at apps/local-sa/src/apps/TodoList.tsx.
Our client component receives the fetched to-do data and the server actions for user interactions.
It manages state for new to-do input and uses event handlers to interact with those server actions:
"use client";
import { useState } from "react";
import {
  Select,
  SelectContent,
  SelectItem,
  SelectTrigger,
  SelectValue,
} from "@/components/ui/select";
import { Input } from "@/components/ui/input";
import { Checkbox } from "@/components/ui/checkbox";

import { Todo } from "@repo/todos";
import { Button } from "@/components/ui/button";

export default function TodoList({
  priorities,
  todos,
  addTodoAction,
  updateTodoCompletionAction,
  deleteTodoAction,
}: {
  priorities: string[];
  todos: Todo[];
  addTodoAction: (title: string, priority: string, completed?: boolean) => void;
  updateTodoCompletionAction: (todoId: string, completed: boolean) => void;
  deleteTodoAction: (todoId: string) => void;
}) {
  const [priority, setPriority] = useState<string>(priorities[0]);
  const [title, setTitle] = useState<string>("");

  const onSubmit = async () => {
    await addTodoAction(title, priority);
  };

  const onSetCompleted = async (id: string, completed: boolean) => {
    await updateTodoCompletionAction(id, completed);
  };

  const onDelete = async (id: string) => {
    await deleteTodoAction(id);
  };

  return (
    <div className="mt-5">
      {todos && (
        <>
          <ul>
            {todos?.map((todo) => (
              <li key={todo.id} className="flex gap-2 items-center mb-3">
                <Checkbox
                  checked={todo.completed}
                  onClick={() => onSetCompleted(todo.id, !todo.completed)}
                />
                <div className="flex-grow">{todo.title}</div>
                <Button variant="destructive" onClick={() => onDelete(todo.id)}>
                  Delete
                </Button>
              </li>
            ))}
          </ul>
        </>
      )}
      <div className="flex gap-2">
        <Select value={priority} onValueChange={(v) => setPriority(v)}>
          <SelectTrigger className="w-[180px]">
            <SelectValue placeholder="Priority" />
          </SelectTrigger>
          <SelectContent>
            {priorities.map((priority) => (
              <SelectItem value={priority} key={priority}>
                {priority}
              </SelectItem>
            ))}
          </SelectContent>
        </Select>
        <Input
          placeholder="Todo"
          value={title}
          onChange={(evt) => setTitle(evt.target.value)}
        />
        <Button onClick={onSubmit}>Submit</Button>
      </div>
    </div>
  );
}
The beauty of this setup is that each time a server action modifies data, in the page.tsx component it revalidates the / path.
This has Next.js re-run the server component associated with this route, then the updated data is sent to the client, seamlessly updating the UI.
Why This Architecture Works
This server action-based local architecture excels for its simplicity. It's easy to understand, has minimal boilerplate, and is performant way to build applications at this scale.