Our application is doing well. We have set up routes, deployed to production, and established communication with OpenAI. However, we encounter a problem when we hit refresh on the application - it forgets our conversations.
To fix this, we need to store these conversations in a place accessible both in development and in production. For our purposes, we will use a Vercel database.
Setting Up a Vercel Database
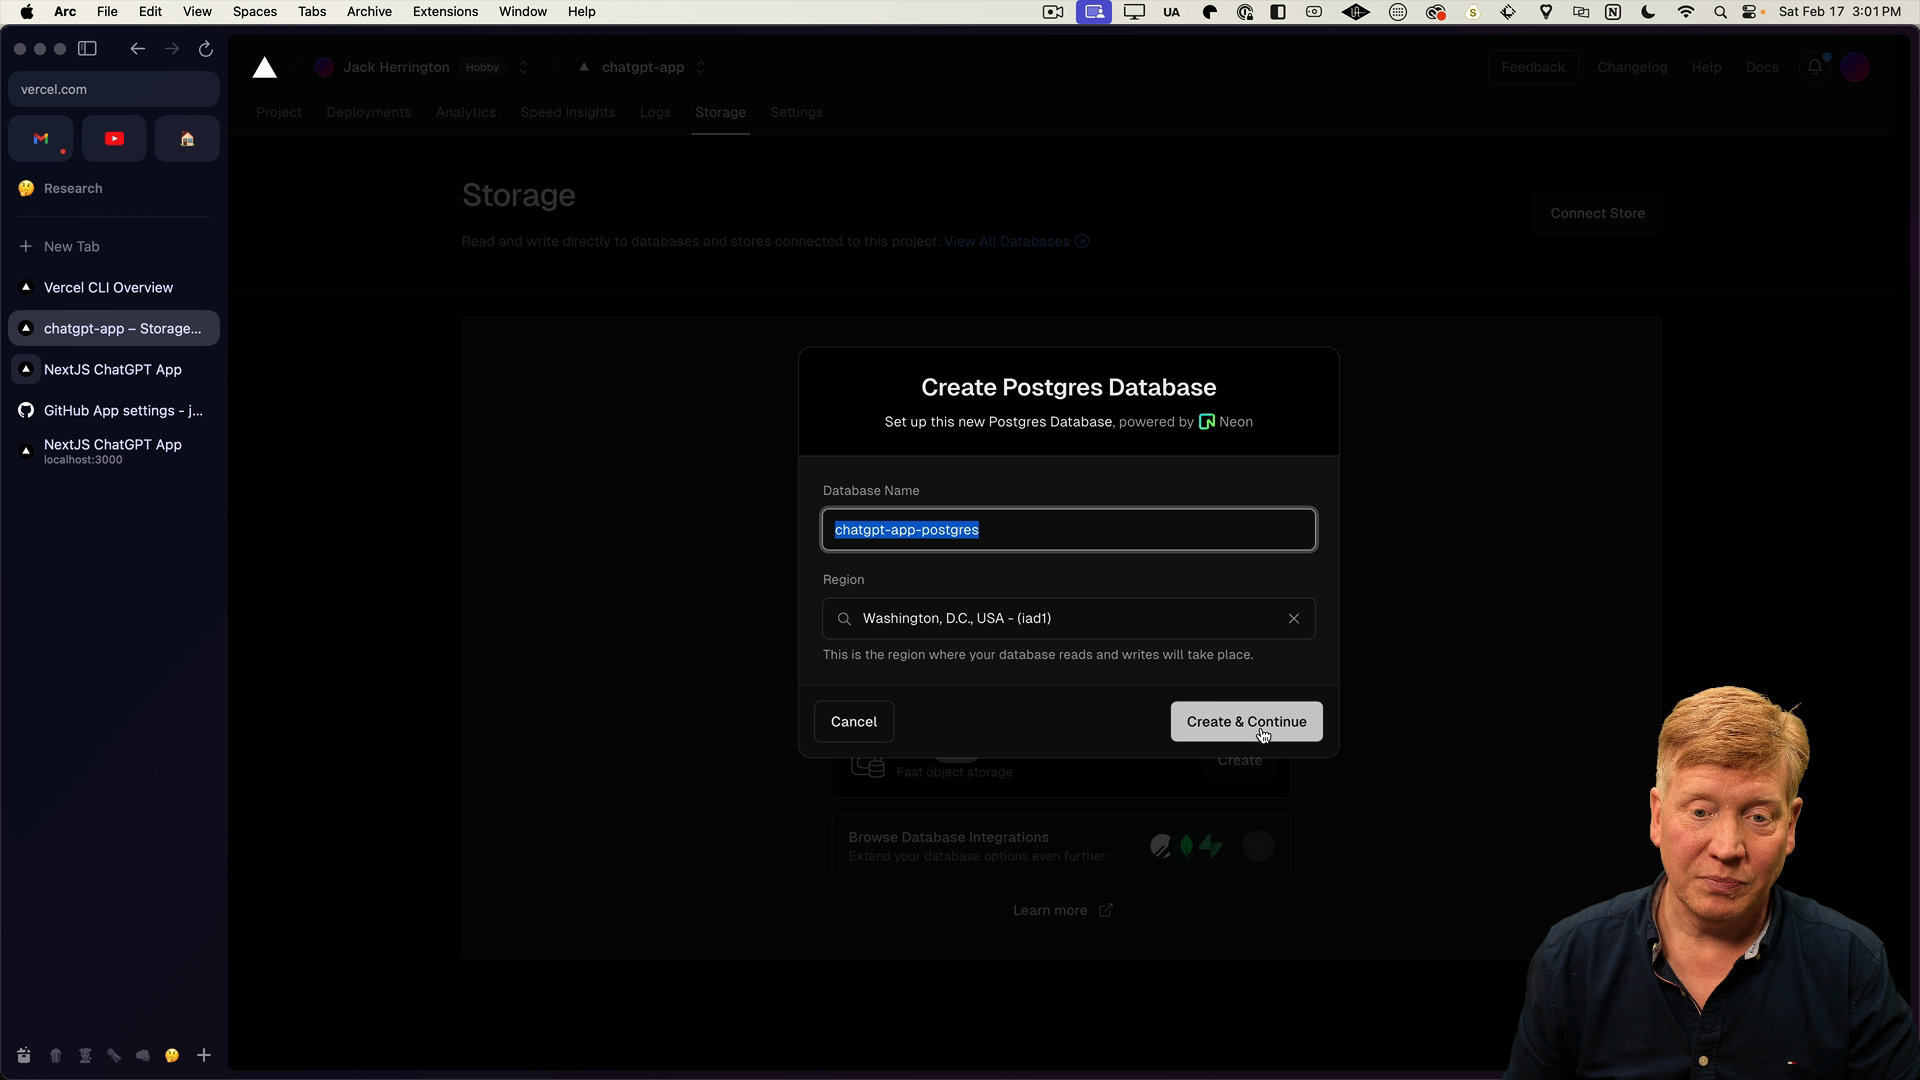
Head over to the Vercel application linked to your project. In the dashboard, find the tab labeled "Storage". Here, we're going to create a Postgres database linked with our project.
Once you are in the Storage section, click on "Create". A terms and conditions window should pop up. Read it thoroughly and when you're ready, click on "Accept".
As for the database name, you can choose whatever you like. In our case, we will stick to the default name, chat-gpt-app-postgres. After naming, proceed to connect this database to your application.

Remember, in a Next.js application, you are not limited to using only databases from Vercel. The choice to use a Vercel database in this scenario is for the simplicity it offers when having to manage a database both locally and in production.
Let's start working on linking our Vercel project and Postgres database with our local development environment.
Install Dependencies
The first thing we need is the Vercel CLI. In your terminal, run the following command:
pnpm i -g vercel
Next, we need to install the Postgres flavor associated with Vercel:
pnpm add @vercel/postgres
Linking Local Development to Production
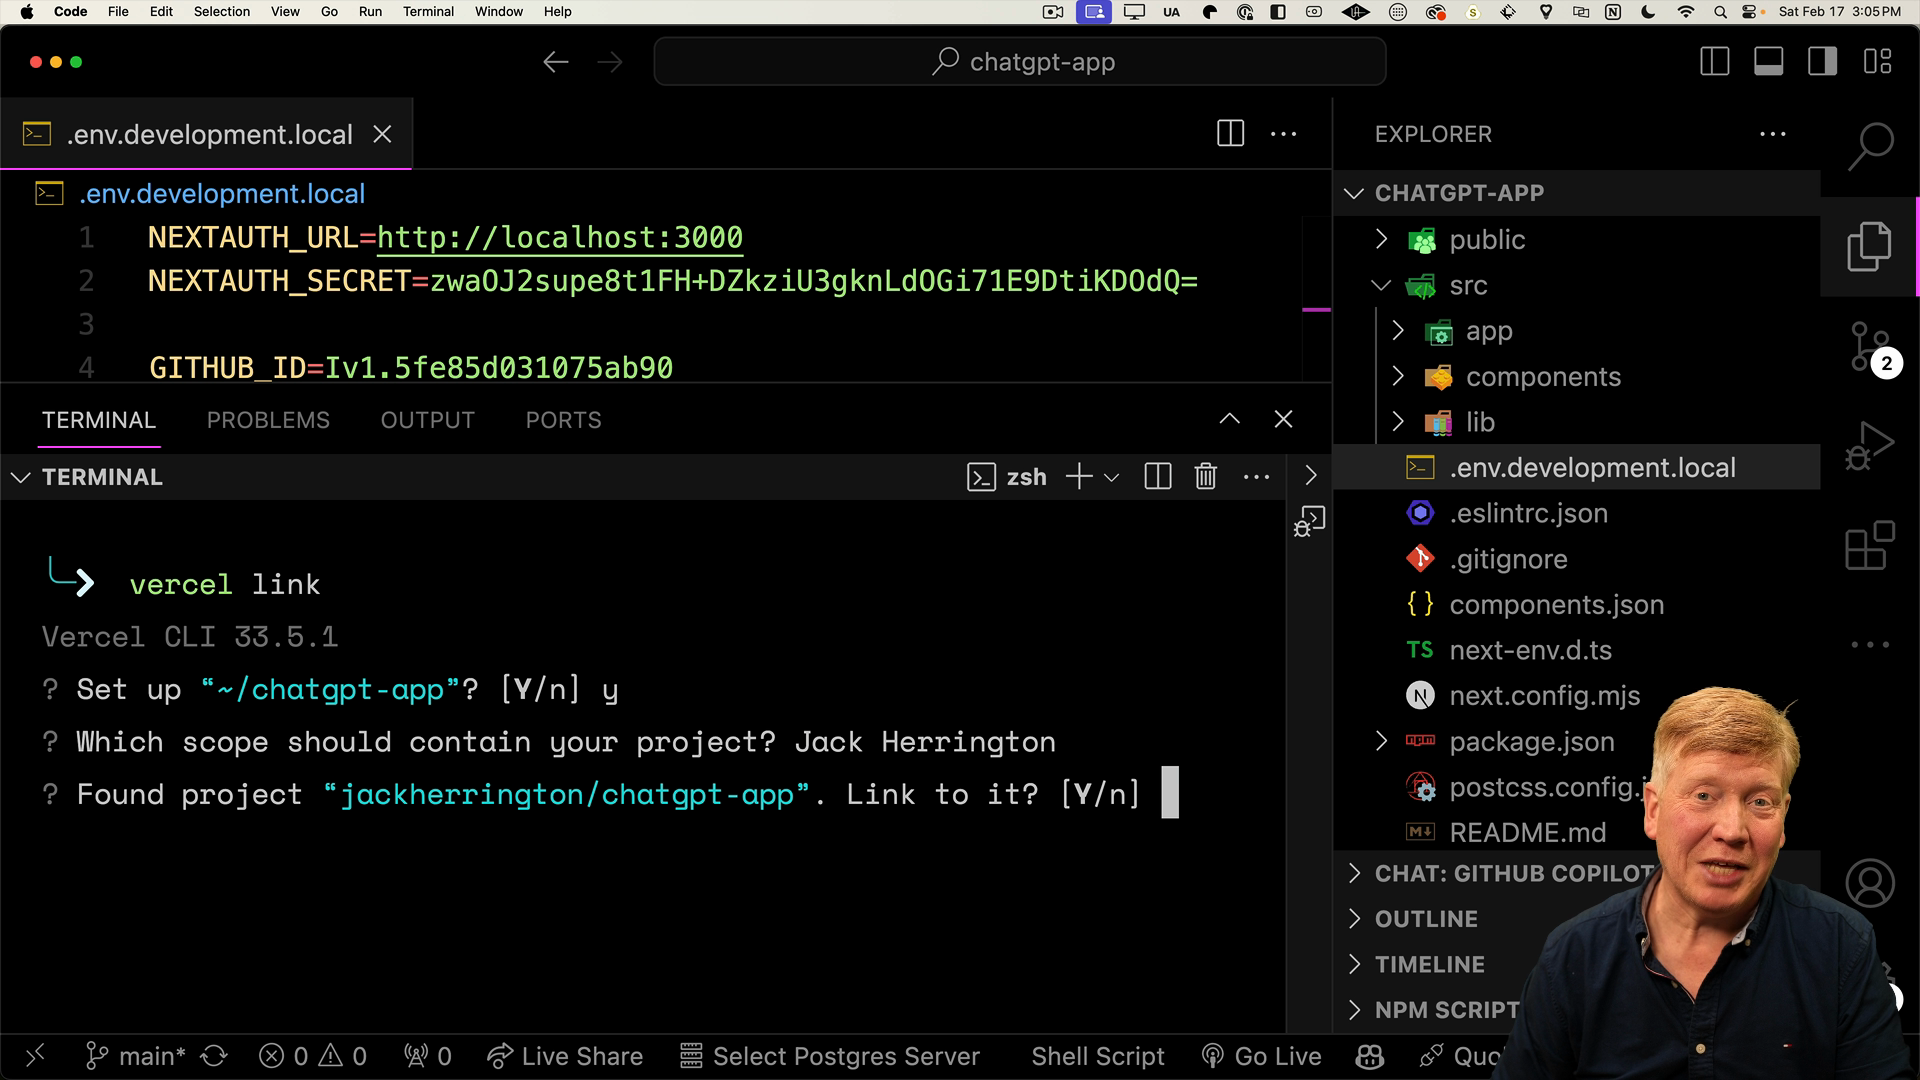
Now that we have our database library, we're ready to link our local development instance to our production instance. We'll use the vercel link command for this:
vercel link
When running the command, the CLI will ask for a few details. First, it wants to confirm your identity. In this case, confirm the link as yourself.
Next, it will hint the applications available. Since we have only one application chatgpt-app, we'll proceed to select it.

Once this is done, we are effectively linked.
The vercel link command creates a new .vercel directory inside of the project. This directory houses a link to our project ID, effectively tying our local development instance to our production instance.
Now we can move on to setting up environment variables for the production instance on Vercel.
Production Database Configuration
To fetch the environment variables from our production instance, we'll use the Vercel command line tool.
In the terminal, run the following command to pull these variables into a temporary file called env.development:
vercel env pull env.development
Note that we don't want to overwrite our env.development.local file, which contains the GitHub-related keys!
After running the above command, the env.development file is created, containing all of the Postgres configuration needed to connect to the database.
Copy all of the contents from env.development and paste it into the env.development.local file. This way, we'll combine the environment variables with our existing GitHub ID and secret.
After moving everything over, you can delete the env.development file since it's not longer needed and contains a lot of extra configuration that we don't want cluttering up our project.
With all of the configuration done, we can start setting up the database.
Creating the Postgres Schema
Inside of the src directory, create a new file at db/schema.psql.
Paste in the following data:
CREATE TABLE chats (
  id SERIAL PRIMARY KEY,
  user_email VARCHAR(255) NOT NULL,
  name VARCHAR(255) NOT NULL,
  timestamp TIMESTAMP DEFAULT CURRENT_TIMESTAMP
);

CREATE TABLE messages (
  id SERIAL PRIMARY KEY,
  chat_id INT NOT NULL,
  role VARCHAR(32) NOT NULL,
  content TEXT NOT NULL,
  CONSTRAINT fk_chat FOREIGN KEY(chat_id) REFERENCES chats (id)
);
The above schema defines two tables:
Within the chats table, we'll have one row per individual chat. The tables will include the following elements:
id: Identifies each unique chat.user_email: The email of the user who initialized the chat.name: The name of the chat, based on the first message.timestamp: When the chat was created.
Each chat will be have many messages.
For the messages table, there are two main elements included:
id: The identifier for the messagechat_id: The chat it belongs to.role: Who sent the message.content: The text of the message.
After defining your schema, save your schema.psql file.
Applying the Schema
Next, we need to apply the schema to the server to create these tables.
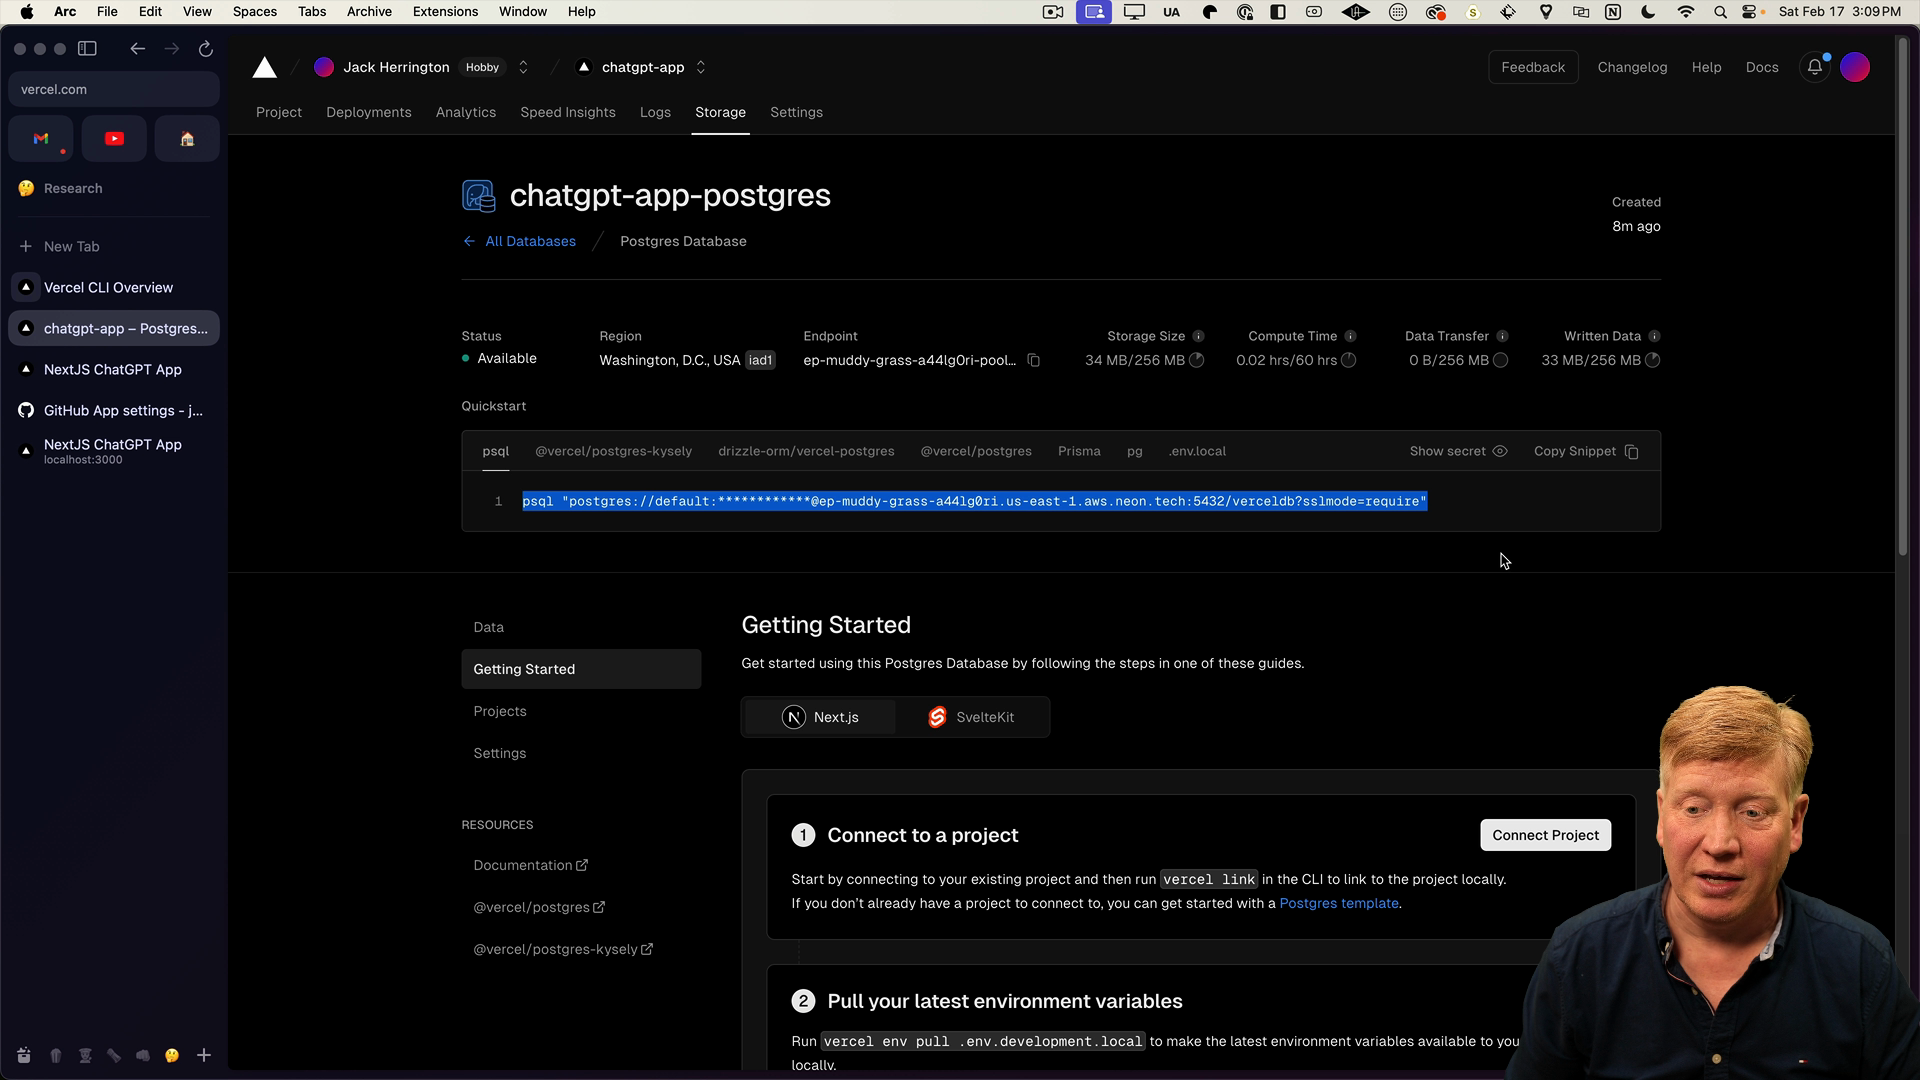
In the Vercel dashboard under the Storage tab, find the command to copy into your terminal to create the database tables.

Once you've copied the command, over in your terminal go into the src/db directory then paste the command. We will add the -f flag to specify we want to run the schema file schema.psql. It should look something like this:
psql "postgres://default:pass@address-.aws.com/verceldb?sslmode=require" -f schema.psql
After running the command, you'll see CREATE TABLE twice, telling us the tables have been successfully created.
To interact with your database, run the same command without the -f flag and you will be dropped into an interactive client that allows you to run SQL commands:
psql "postgres://default:pass@address-.aws.com/verceldb?sslmode=require"

// loads the psql client
verceldb=>
Running select * from chats; proves the table is set up and ready to go:
verceldb=> select * from chats;
id | user_email | name | timestamp
---+------------+------+----------
(0 rows)
Please note here that even though you can have different database instances for dev and production, you'll be limited to using one database at a time if you're on the free account from Vercel. For the sake of simplicity, let's stick with the single database for both dev and production.
With the database ready to go, let's define some types to use throughout the application.
Defining Types
At the root level, create a new file called src/types.ts. The types we're going to define will essentially mirror the fields in our database.
The Chat type will contain the same fields as its database counterpart: id, name, userEmail, and timestamp.
The Message type will be lightweight, and only contain role and content. Other types will extend it, adding their own properties.
// inside src/types.ts

export interface Chat {
  id: number;
  name: string;
  user_email: string;
  timestamp: Date;
}

export interface Message {
  role: "user" | "assistant";
  content: string;
}

export interface StoredMessage extends Message {
  id: number;
  chat_id: number;
}

export interface ChatWithMessages extends Chat {
  messages: StoredMessage[];
}
Our groundwork has been laid with the database and types all set up.
Creating Database Functions
Our next step is creating functions for common operations like adding a chat or a message.
Create a new index.ts inside of the db directory. At the top of the file, import sql from Vercel's Postgres package for executing SQL queries, as well as the types we defined earlier:
// inside db/index.ts

import { sql } from "@vercel/postgres";

import type { Chat, ChatWithMessages, Message} from "../types";
The first function we'll create will be called createChat. This function takes in a user's email address, a name, and messages as parameters. Using the sql package, we'll fire off several SQL queries:
export async function createChat(
  userEmail: string,
  name: string,
  msgs: Message[]
) {
  await sql`INSERT INTO chats (user_email, name) VALUES (${userEmail}, ${name})`;

  const { rows: lastInsertId } =
    await sql`  SELECT currval(pg_get_serial_sequence('chats','id'))`;

  const chatId = lastInsertId[0].currval;
  for (const msg of msgs) {
    await sql`INSERT INTO messages (chat_id, role, content) VALUES (${chatId}, ${msg.role}, ${msg.content})`;
  }

  return chatId;
}
We also need a function to fetch a chat given its ID. The getChat function will take a chatId and returns a ChatWithMessages that includes all the chat information, including the messages.
To retrieve a list of all chats, we'll create a helper function named getChats, which simply selects all the chats from the database.
export async function getChat(
  chatId: number
): Promise<ChatWithMessages | null> {
  const { rows: chats } = await sql`SELECT * FROM chats WHERE id = ${chatId}`;
  if (!chats[0]) {
    return null;
  }
  const { rows: messages } =
    await sql`SELECT * FROM messages WHERE chat_id = ${chatId}`;
  return {
    ...chats[0],
    messages: messages.map((msg) => ({
      ...msg,
      role: msg.role as "user" | "assistant",
      content: msg.content,
    })),
  } as ChatWithMessages;
}

export async function getChats(userEmail: string): Promise<Chat[]> {
  const { rows: chats } =
    await sql`SELECT * FROM chats WHERE user_email = ${userEmail}`;
  return chats as Chat[];
}
For the homepage, we'll create a getChatsWithMessages function that returns the top three chats along with some of their messages. Then we'll also have a getMessages function that takes a chatId and returns all the messages associated with that chat.
export async function getChatsWithMessages(
  userEmail: string
): Promise<ChatWithMessages[]> {
  const { rows: chats } =
    await sql`SELECT * FROM chats WHERE user_email = ${userEmail} ORDER BY timestamp DESC LIMIT 3`;

  for (const chat of chats) {
    const { rows: messages } =
      await sql`SELECT * FROM messages WHERE chat_id = ${chat.id}`;
    chat.messages = messages.map((msg) => ({
      ...msg,
      role: msg.role as "user" | "assistant",
      content: msg.content,
    }));
  }

  return chats as ChatWithMessages[];
}

export async function getMessages(chatId: number) {
  const { rows: messages } =
    await sql`SELECT * FROM messages WHERE chat_id = ${chatId}`;

  return messages.map((msg) => ({
    ...msg,
    role: msg.role as "user" | "assistant",
    content: msg.content,
  }));
}
Vercel's postgres package makes these operations a breeze by setting up our environment variables for us. We can perform SQL queries wherever needed, wait for the result, and voila! We have our data.
With all of the functions created, let's try them out!
Updating the getCompletion Server Action
Over the the getCompletion server action, import createChat and updateChat from @/db:
// inside db/index.ts

import { createChat, updateChat } from "@/db";
We need these because when we request completions from the server, we are either updating an existing chat or creating a new one.
Then in order to identify the user making the request, we'll import getServerSession from NextAuth. Remember, we need to use this because we're in a server action, instead of using useSession that we would use in a client component:
import { getServerSession } from "next-auth";
Now we need to make some updates to the getCompletion function.
First, we'll add an id to the parameters that corresponds to the chat and will be a number or null.
export async function getCompletion(
  id: number | null,
  messageHistory: {
    role: "user" | "assistant";
    content: string;
  }[]
) { // rest of function as before
Then after the messages variable is created, we'll get the session from getServerSession:
// inside the getCompletion function:

const session = await getServerSession();
Once we have the session, we need to determine whether we need to call createChat or updateChat by checking for the chatId. If there is no id, we'll call createChat with the session and messages. Otherwise, we'll call updateChat:
let chatId = id;
if (!chatId) {
chatId = await createChat(
    session?.user?.email!,
    messageHistory[0].content,
    messages
);
} else {
await updateChat(chatId, messages);
}

return {
messages,
id: chatId,
};
Now we need to update the Chat component to match the updated server action.
Updating the Chat Component
Inside of components/Chat.tsx, we need to add the chatId as a parameter when calling getCompletion in the onClick handler.
We could store the chatID in state, but since we don't want a re-render when chatID changes, we'll use a a ref with useRef instead.
After updating the imports to bring in useRef from React, we'll create a new chatId variable inside the Chat component that starts as null:
export default function Chat() {
  const [messages, setMessages] = useState<Message[]>([]);
  const [message, setMessage] = useState("");
  const chatId = useRef<number | null>(null);
...
Next, we'll update the getCompletion call to use chatId.current as the first parameter, and set the current chatId after the request to getCompletion:
 const onClick = async () => {
    const completions = await getCompletion(chatId.current, [
      ...messages,
      {
        role: "user",
        content: message,
      },
    ]);
    chatId.current = completions.id;
    setMessage("");
    setMessages(completions.messages);
  };
Now that the Chat component has been updated, we can test the app out by typing out a message.
Testing the Application
Back in the browser, refresh the application and ask What is 1+2?. The app should display the answer as expected.
Over in the terminal, we can run a SQL query in the verceldb client to get the messages:
verceldb=> select * from messages;
The output shows us each of the messages as we saw in the UI:
id | chat_id | role     | content
---+---------+----------+-----------
3  | 2       | user     | What is 1+2?
4  | 2       | assistant| 1 + 2 = 3
(2 rows)
This confirms that our chat application is now successfully interacting with the database both during development and production!
We are now able to create new chats if no existing chat is present, and update a chat if it's already ongoing. The chatId is being stored efficiently using useRef to prevent unnecessary re-renders, and the database is successfully recording and retrieving chat data both in production and during development.
Next Steps
The next concept we are going to explore is parameterized routes.
Imagine this scenario: you've been interacting in a chat, but you had to step away from your computer. You want to return to that same chat and pick up right where you left off. Parameterized routes make this possible.
In the next lesson, we'll get this feature set up!